Total Pageviews

Showing posts with label 15mm. Show all posts

Tuesday, May 9, 2017

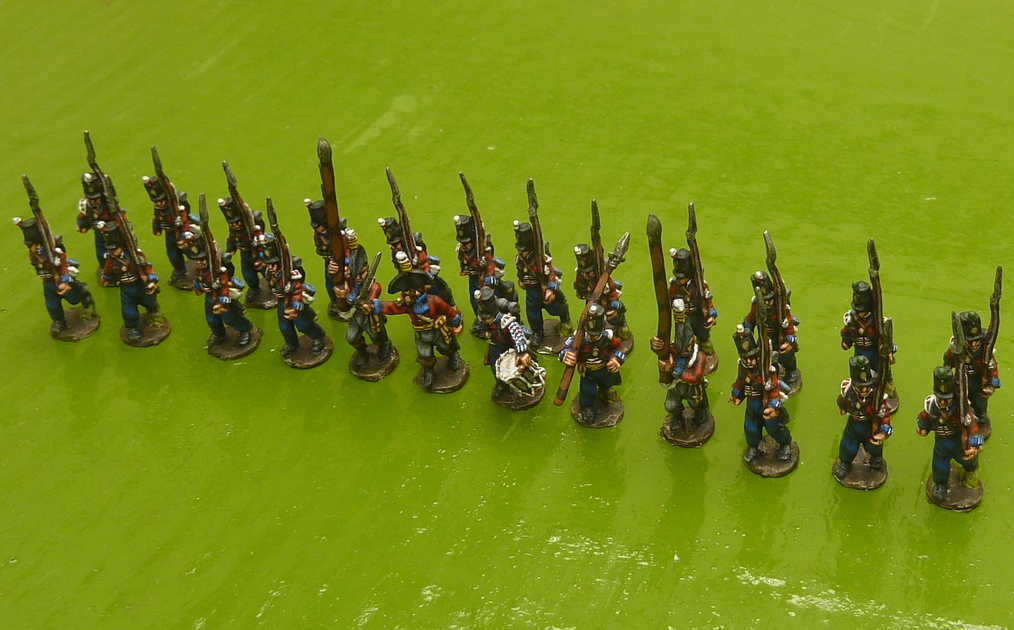
15mm Napoleonic British and French infantry (Blue Moon miniatures)

I have painted some of the lovely figures from Blue Moon miniatures. They are compatible with AB, size and style wise.

42nd Highlanders 


French Line infantry in Full Dress


British 51st Light infantry


Sunday, March 19, 2017

15mm British 79th Highlanders and Luneberg Hanoverians

Blue Moon 15mm figures are very detailed. They are on a par with AB. I have painted these British Highlanders and some British Peninsula infantry painted as Hanoverians.


Here are the Hanoverians.  I don't stock Belgic Shako for 15mm, so I did them in the Peninsula Shako. 


15mm Napoleonic Hanoverian Luneberg infantry


Thursday, August 13, 2015

Selling off some 15mm WW2 figures

I am selling off some 15mm WW2 figures in mixed "bags" of 50. The figures are from the Command decision range. There are American, British, German and Russian to choose from.

Details here

http://reinforcementsbypost.com/content/special-offers

Saturday, December 1, 2012

15mm WW2 German tanks camouflaged

Here are some 15mm German tanks which I have airbrushed. This time I used vallejo's airbrush paint, together with airbrush medium to dilute it. I also had the compressor produce the right pressure (I'd always had it too high before).

First I airbrush the tanks, then I ink them, then I dry brush with pale sand, to bring out the edges. I paid on the tracks lastly, and ink over them.

I am going for a battle worn look. The Panthers are all in three colour camouflage. Some of the stugs are in three colour, others in brown over a base coat of desert yellow. I painted "kill rings" on some tanks. You can click on a picture to get a larger image.


Wednesday, January 4, 2012

15mm German Panther tank breakthrough

I've been fooling around painting these tanks for about a year now. I keep bringing them back out to touch up, or to start again. I'm finally finished (I think!) My technique is to black undercoat the model, then air brush on a mid tone for the base colour (desert yellow in this case), but leaving some areas black on the tank. Then I air brush over the two other colours for the camouflage. At this state I dry brush the tank with a mix of pale sand (mostly) and stone grey. This is essential to bring out detail on the tank. It is nerve wracking to have done so much work and then to take the chance of spoiling it, but you may as well not bother if you aren't going to dry brush at this stage. The results were still not satisfactory, and I tried various washes, which were a waste of time, both before and after dry brushing (and repainting..). I was after more contrast on the model, so what I eventually did was to airbrush black onto the model as a last step, around the turret, and then in a few other spots. Voila! I was at last satisfied.

For my next trick I have some 28mm Bolt Action and Berlin or Bust vehicles I'm working on. It was seeing Troop of Shewe's excellent work on 28mm tanks that got me interested in airbrushing.

I'll be selling ready painted 15mm vehicles. Now I have the hang of things hopefully it won't take a year for each batch of 20 vehicles..

Here are all of the vehicles I've just finished brought to you in marvelous repeatovision.

15mm Command Decision Panther tanks air brushed

15mm Command Decision Panther tanks air brushed

15mm Command Decision Panther tanks air brushed

15mm Command Decision Panther tanks air brushed

15mm Command Decision Panther tanks air brushed

15mm Command Decision Panther tanks air brushed

15mm Command Decision Panther tanks air brushed

15mm Command Decision Panther tanks air brushed

15mm Command Decision Panther tanks air brushed

15mm Command Decision Panther tanks air brushed

15mm Command Decision Panther tanks air brushed

15mm Command Decision Panther tanks air brushed

Sunday, June 5, 2011

New Panther picture with diffuse lighting

Following suggestions from http://www.theminiaturespage.com I tried taking a picture of my tanks with diffuse lighting. The lighting in my light box comes from four 2' tube lights mounted in a square box that you generally see in an office ceiling. To make the light diffuse, I taped thin packing tissue under this box, so the light has to pass through this. I think the tanks look better. I may now be able to fool around with the image to accurately depict what the tank really looks like.

Tuesday, May 31, 2011

Photo frustration with my airbrushed tanks

I have been painting, airbrushing, washing, dry brushing, tweaking and teasing some WW2 German panther tanks for a few months. In life they look fantastic. I'm not just saying that because I put so much work into them. They really do look great. They have bags of contrast, dark spaces that look dirty, faded out cammo (actually you can hardly tell that they are cammo, they are so faded and "dirty"), yet the dry brushing picks up all the raised areas, especially the zimmermit anti magnetic mine paste, while leaving the dark areas still looking dark.

So what is the problem? Well, the photos I have been able to take look awful. There is no exposure setting that can really show the dark areas, while maintaining any light. There is no setting that shows the light areas properly at all. The best I can do is fade the whole thing to a light colour which totally wipes out the contrast. It looks like I've done a crappy job.

My next hope is to combine images with a HDR package like GIMP (Gnu Image Manipulation Program). HDR stands for High Dynamic Range. Computer programs, or the cameras themselves, combine several exposures to produce a range of exposure that would not normally be possible. Here are three images I took at different exposure settings. Firstly, the one the camera wanted, next -1 exposure value, lastly -2 exposure values.

This is the image my camera wanted to take. It has totally zapped the contrast.  Those areas that look a little darker in the photo are really dark, with that yellow colour dry brushed over showing up the zimmermit.


Second photo at -1 exposure value.


Third photo, at -2 exposure value compared to the first, and coming closer to the darkness for some of the dark areas (which are still darker in reality)

The tanks are from Old Glory USA.